Before automating irrigation
Automatic irrigation is not about switching on a pump when a number drops below a limit. You need to know the type of plant, the growing medium, the flow rate, the watering time and what happens if the sensor or the network fails.
This project uses an ESP32 to read a soil moisture sensor and control a relay or a valve. The low-voltage part must stay separated from the mains supply. If the pump runs at 230 V, the installation must be done by a qualified person with suitable equipment.
Materials
- A development ESP32.
- A soil moisture sensor, preferably capacitive and protected.
- A stable power supply for the ESP32.
- A relay module or load controller compatible with the voltage used.
- A pump or solenoid valve suited to the flow rate.
- Pipe, a reservoir and a drainage system.
- A level sensor or dry-run protection if the installation needs it.
A cheap sensor buried permanently can degrade. Protect the connections, calibrate the real range of the growing medium and keep the system accessible for maintenance.
How to measure moisture
Capacitive sensors usually cope with soil better than metal probes that rely on a current flowing between electrodes. Even so, the reading is not a universal percentage. The value depends on the soil, the pot, the temperature, the position and the power supply.
Calibrate two points: the value of the growing medium when dry that you consider problematic, and the value after enough watering. Save both values and decide the threshold from repeated measurements, not from a single reading.
Wiring the ESP32
Connect the sensor’s VCC and GND according to its datasheet, and the analog output to a compatible ADC on the ESP32. Choose the GPIO after checking that it is not used at boot or by another peripheral. Do not power the pump from the 3.3 V pin.
The relay needs its own supply if the load requires it. The control signal must be compatible with the ESP32, and a common ground is only used when the circuit and the module need it according to their design.
Reading configuration
An analog reading has to be turned into a value that means something for your growing medium. A guideline configuration in ESPHome is:
sensor:
  - platform: adc
    pin: GPIO34
    name: "Humedad de suelo cruda"
    update_interval: 30s
    attenuation: auto

switch:
  - platform: gpio
    pin: GPIO26
    name: "Bomba de riego"
    id: bomba_riego
    restore_mode: ALWAYS_OFF
The pins, the attenuation and the conversion to a percentage depend on the board and the sensor. Before adding an automation, watch the raw value in dry, moist and saturated soil.
Safe automation
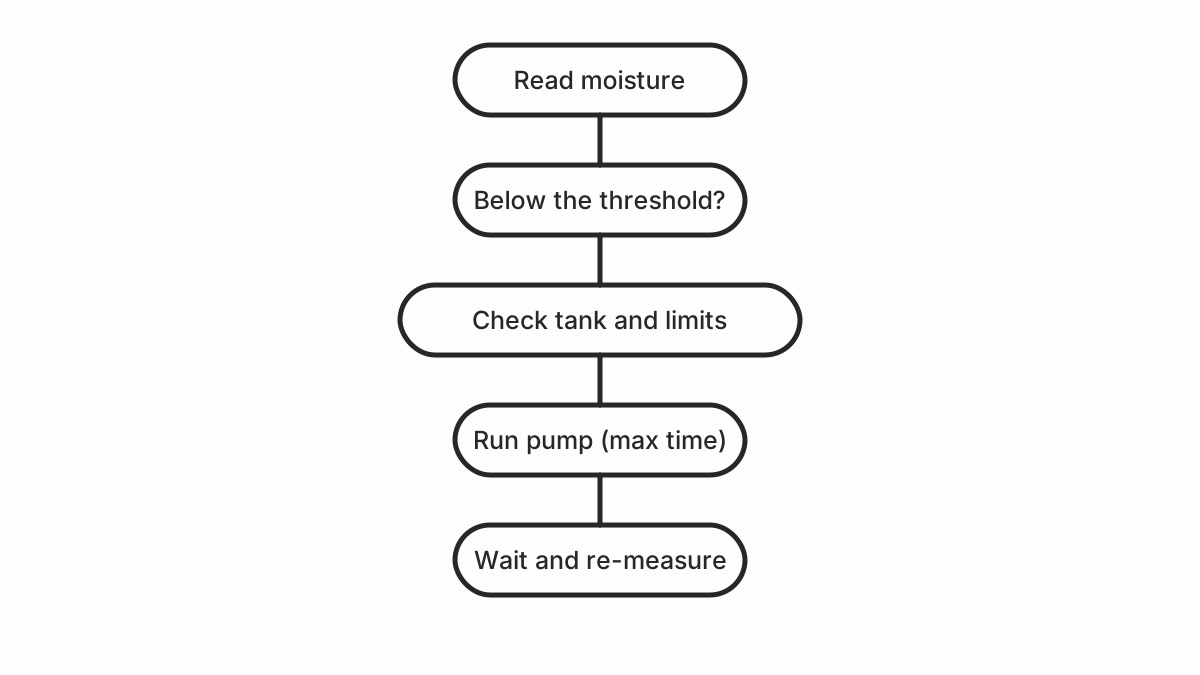
The rule must include several safeguards:
- Water only if the moisture is below the threshold.
- Keep a maximum pump runtime.
- Prevent a second watering round until a minimum interval has passed.
- Do not water if the reservoir is empty.
- Allow manual switch-on and manual switch-off.
- Define what happens if the sensor reading is lost.
A threshold with hysteresis prevents the pump from switching on and off constantly. For example, start below one level and stop above another, as long as both values are calibrated for that pot.
Tests before installing
Test the logic with no water and the relay disconnected. Then test the pump with a short runtime and check leaks, flow rate and drainage. Simulate a disconnected sensor, an empty reservoir and a power loss. The plant should not depend on the Home Assistant dashboard being open.
Common problems
- Moisture does not change: wrong ADC pin, sensor without ground or a badly placed probe.
- Inverted readings: some sensors output more voltage when dry and others when wet; calibrate before converting to a percentage.
- The pump restarts: insufficient supply or electrical noise from the load.
- It waters too much: missing maximum runtime, hysteresis or level sensor.
- The sensor corrodes: resistive probe exposed for too long.
Safety
Do not mix water and mains electricity on a breadboard. Use enclosures, cable glands, fuses and a relay certified for the load. Keep the control module away from splashes and disconnect the power supply before modifying the wiring.
External sources
- ESPHome: ADC sensor — configuration, attenuation, samples, calibration, offset, filters.
- Espressif: ADC guide — channels, attenuation, calibration, noise, resolution, characterization.
- Espressif: hardware design guide — schematics, pins, power, signal, ground, antenna.
- FAO: drainage and irrigation — water needs, evapotranspiration, substrate, drainage.
- FAO: irrigation scheduling — frequency, depth, efficiency, uniformity.
- REBT: ITC-BT-18, ITC-BT-19, ITC-BT-20 — protection, isolation, clamps, panels, professional competence.
- IEC 61010-1: safety requirements — isolation, measurement categories, marking, tests.
- ESPHome: ADC sensor — configuration, attenuation, samples, calibration, offset, filters.
- ESPHome: GPIO switch — configuration, restore_mode, interlock, blocking.