Editorial note: check the specific module, the ESPHome version and the figures on the manufacturer’s datasheet before publishing this.
What the BME280 measures
The BME280 is a digital sensor from Bosch Sensortec that measures temperature, relative humidity and atmospheric pressure. On prototyping modules it normally talks over I2C, although the component can also use SPI.
It’s an interesting alternative to a DHT when you need pressure on top of temperature and humidity, or when you want a standard bus with registers and oversampling options. It is not an air quality sensor: it doesn’t measure CO2, particles or volatile organic compounds directly.
Indicative specifications
| Feature | BME280 |
|---|---|
| Measurements | Temperature, humidity and pressure |
| Interface | I2C or SPI |
| Chip supply | Per the manufacturer datasheet; the chip runs on a low voltage |
| Humidity accuracy | Approximately ±3 % RH under specified conditions |
| Temperature accuracy | Approximately ±1 °C under specified conditions |
| Pressure accuracy | Approximately ±1 hPa under specified conditions |
| Typical I2C address | 0x76 or 0x77, depending on the SDO pin state |
These figures are a reference for the BME280 family, not a guarantee for every commercial module. The breakout board may include a regulator, level shifting and a pull-up resistor. Check the documentation of the board you bought and don’t mistake a BME280 for a BMP280: the BMP280 doesn’t measure humidity.
I2C wiring to the ESP32
On an ESP32 development board, a typical connection is:
| BME280 | ESP32 |
|---|---|
| VCC or VIN | A supply compatible with the module |
| GND | GND |
| SDA | GPIO21 as a common example |
| SCL | GPIO22 as a common example |
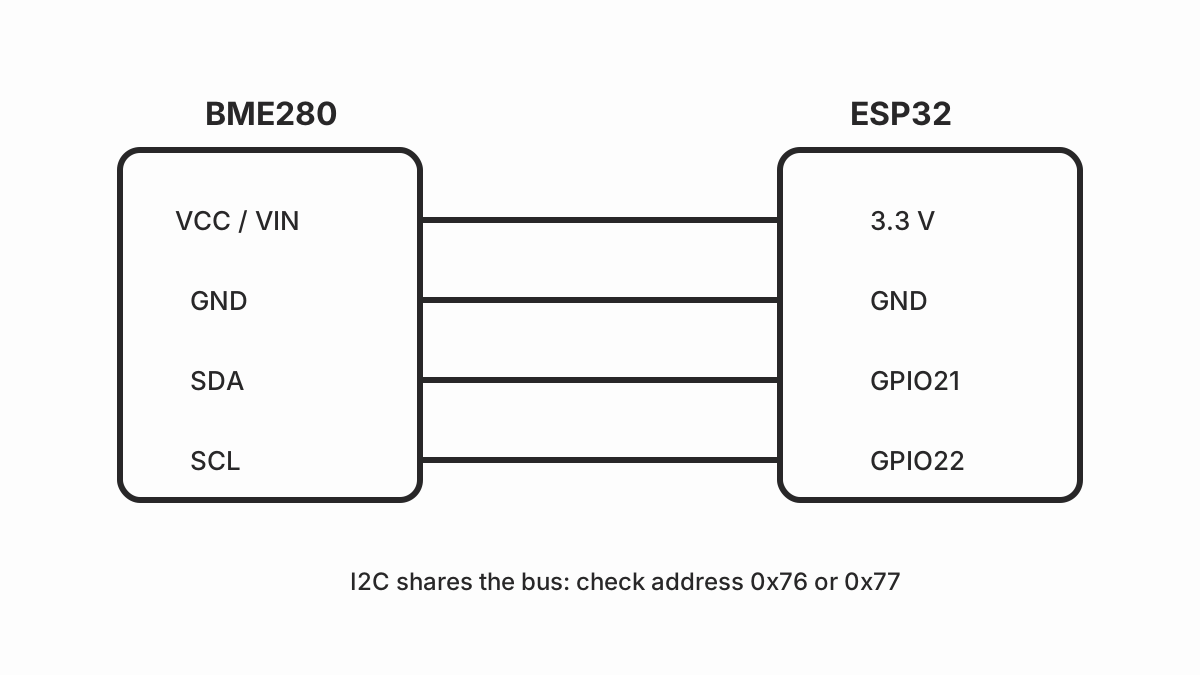
GPIO21 and GPIO22 are a frequent choice for I2C on the ESP32, but they aren’t universal. Your board or project may use other pins. Configure them explicitly and avoid pins reserved for booting or already taken by another peripheral.
The BME280 chip runs on a low voltage. Some modules accept 5 V on the pin marked VIN because they include a regulator and adaptation circuitry, while others expose the chip directly. If you don’t know what circuit the module has, use 3.3 V and check its schematic. Feeding 5 V into a GPIO can damage it.
Detecting the I2C address
The address usually depends on the SDO pin. Two modules don’t have to use the same address, and some products include jumpers or resistors to change it. If the sensor doesn’t show up:
- Check VCC and GND.
- Make sure SDA and SCL aren’t swapped.
- Run an I2C scan.
- Try
0x76and0x77if the module doesn’t document its address. - Confirm that the pull-ups exist and that the bus voltage is compatible.
Don’t change the address in the configuration to hide incorrect wiring. First confirm that the scanner physically detects the module.
Configuration with ESPHome
This example uses GPIO21 and GPIO22 and leaves the address at 0x76. Adapt the
pins, the name and the interval to your setup:
i2c:
  sda: GPIO21
  scl: GPIO22
  scan: true

sensor:
  - platform: bme280_i2c
    address: 0x76
    temperature:
      name: "Living room temperature"
    humidity:
      name: "Living room humidity"
    pressure:
      name: "Atmospheric pressure"
    update_interval: 60s
The address and the component name must match the installed ESPHome version. Compile without any extra automations first and watch the log. If the device shows up but one measurement doesn’t change, review the corresponding block and the update interval.
How to interpret the pressure
The pressure the sensor reports is absolute pressure at the point where it is installed. Don’t compare it directly with a weather forecast without taking altitude and the type of pressure shown by the external service into account.
A pressure change can serve as trend data, but it doesn’t turn the BME280 into a complete weather station. The enclosure, the heat from the board and the sensor position all influence the readings.
Calibration and checks
The BME280 usually comes calibrated from the factory, but that doesn’t mean two cheap modules give exactly the same value. To check this:
- Place two sensors together, away from draughts and heat sources.
- Wait until they reach a stable temperature.
- Compare trends and differences over several hours, not a single reading.
- Check that humidity isn’t affected by condensation or by touching the sensing element.
- Document an offset only if you have a reasonable reference and the application justifies correcting it.
Don’t use an offset to hide a power problem, a wrong address or a module that is really a BMP280. Fix the electrical and configuration cause first.
Frequent errors
- Not detected over I2C: wiring, address, pull-ups or power.
- Humidity always at zero: wrong module, wrong component or a damaged sensor.
- Temperature too high: the board sits near the regulator, the ESP32 or a heat source.
- Inconsistent pressure: compare units, altitude and location before interpreting the figure.
- Unstable readings: lengthen the interval, review the bus and keep the cables away from noise-generating loads.
External sources
- Bosch Sensortec: official BME280 page — datasheet, specifications, application, evaluation.
- Bosch Sensortec: BME280 datasheet — range, accuracy, interface, power, pins, protocol, compensation.
- ESPHome: BME280 I2C component — platform, address, oversampling, IIR, update, calibration, offset.
- Espressif: I2C peripheral — master, slave, speed, pull-ups, timeout, detection, errors.
- Espressif: ESP32 datasheet — I2C pins, internal pull-ups, max speed, buffers, interrupts.
- Espressif: I2C documentation — master, slave, speed, pull-ups, timeout, detection, errors.
- NXP: I2C application note — bus, addresses, pull-ups, capacitance, length, termination, noise.
- I2C: specification — standard, fast, fast-plus, high-speed, addressing, arbitration, ACK/NACK.
Next step
If you want to continue with a simple analog reading, you can try the LDR and ESP32 wiring.
If you are still choosing the board, check ESP32: what it is, what it’s for and how to get started. To compare this sensor with the DHT11 and the DHT22, see the DHT11 vs DHT22 guide.