What the HLK-LD2410 is
The HLK-LD2410 is a presence sensor based on mmWave radar. Unlike a PIR, which mainly detects changes in infrared radiation, it can keep detecting a person who is sitting still inside its coverage zone. That makes it useful for lighting, climate control and automations where a one-off movement isn’t enough.
It isn’t a magic sensor: furniture, walls, orientation, fans and moving objects can change the result. The installation and the distance configuration matter as much as the module.
What you need
- An HLK-LD2410 module compatible with the integration you chose.
- An ESP32 with a stable power supply.
- Dupont wires or a breadboard.
- ESPHome and Home Assistant.
- A test space where nobody is moving around continuously while you set things up.
The module uses UART communication for its configuration and its readings. Check the exact version, because there are variants with Bluetooth and revisions with wiring differences. Don’t use another model’s diagram without checking the silkscreen.
Basic wiring to the ESP32
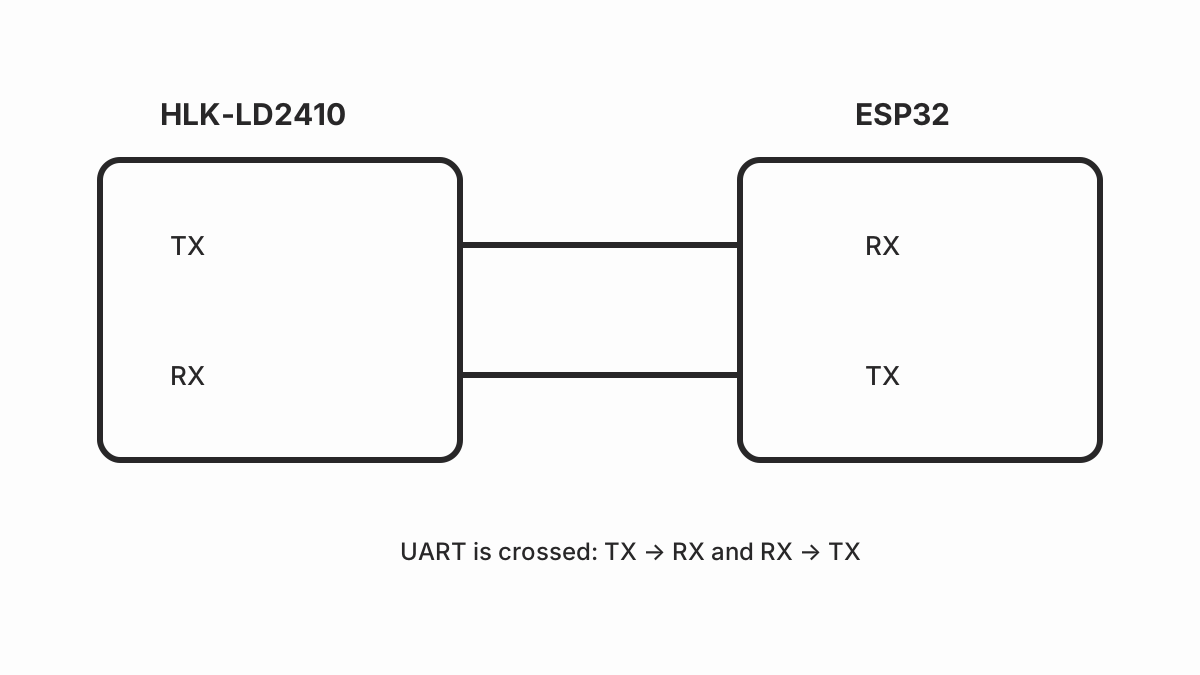
The usual connection needs power, ground and two UART lines:
| HLK-LD2410 | ESP32 | Function |
|---|---|---|
| VCC | Compatible supply | Power for the module |
| GND | GND | Common reference |
| TX | ESP32 RX | Data from the sensor to the microcontroller |
| RX | ESP32 TX | Configuration from the microcontroller |
The specific GPIOs depend on your board. Avoid the boot pins and the ones used by the USB-serial adapter. The supply must follow the module datasheet and the UART signals must share the ground reference.
Configuration with ESPHome
ESPHome has components for several LD2410 versions. A rough structure is:
uart:
  tx_pin: GPIO17
  rx_pin: GPIO16
  baud_rate: 256000

ld2410:

binary_sensor:
  - platform: ld2410
    has_target:
      name: "Presence detected"
    has_moving_target:
      name: "Movement detected"
    has_still_target:
      name: "Still presence"
Adapt the pins, the speed and the names to the module and ESPHome version. Don’t
copy the baud_rate value without checking your component’s documentation.
Compile first, connect the module and review the log before adding automations.
Presence vs movement
The most important difference is that the sensor can expose separate states:
- Movement: there is displacement inside the watched zone.
- Still presence: the radar still detects a person even if they barely move.
- Target: the sensor detects activity, but doesn’t identify who is there.
For a hallway light, movement is usually enough. To keep a bathroom light on while someone stays still, presence can be more useful. Set an off delay and an exit condition to avoid rapid switching when the reading fluctuates.
If all you need is movement detection, a PIR HC-SR501 is simpler and cheaper.
Tuning the zones and the distance
Start with a conservative distance and increase it little by little. If you cover the whole room on the first try, it’ll be hard to tell which wall or object is causing false positives. Test while sitting, while standing and outside the zone you want.
Don’t place the radar behind metal or pointing straight at an area with fans, curtains or moving surfaces. Document the position and the values you set so you can reproduce the setup later.
Common errors
- No data: check TX/RX, ground, power and the UART speed.
- Constant readings: make sure the module’s antenna is clear and that the configured distance isn’t too large.
- False positives: reduce the zones, the distance and the sensitivity; keep the sensor away from fans and doors that vibrate.
- ESP32 restarting: use a stable supply and don’t power loads from a GPIO of the microcontroller.
- A configuration option doesn’t appear: the module variant or the ESPHome version may not support it yet.
Privacy and security
The LD2410 detects presence, it doesn’t identify faces or record video. Even so, an automation that infers occupancy of a room is sensitive information. Keep Home Assistant inside the protected network, use unique passwords and don’t expose its dashboard directly to the internet.
External sources
- HLK-LD2410: datasheet — range, resolution, UART, zones, sensitivity, consumption.
- HLK: official LD2410 documentation — specifications, UART, zones, sensitivity, consumption, pins.
- ESPHome: LD2410 sensor — platform, UART, zones, sensitivity, sensitivity per zone, update, binary_sensor.
- Espressif: UART documentation — pins, baud rate, buffer, timeout, interrupts, DMA.
- Espressif: ESP32 documentation — pins, memory, UART, DMA, interrupts, buffer.
- mmWave radar documentation — principles, range resolution, velocity, Doppler, FMCW, noise, false positives.
- FMCW radar documentation — chirp, chirp rate, bandwidth, range resolution, velocity resolution, SNR.
- ESPHome: LD2410 sensor — platform, UART, zones, sensitivity, sensitivity per zone, update, binary_sensor.
- TI IWR radar documentation — FMCW, chirp, Doppler, range resolution, velocity resolution, target detection.