What is home automation
Home automation means using sensors, devices and software to monitor and automate tasks around the home. It can be something as simple as turning on a light when motion is detected, getting an alert when a door opens, or checking the temperature of a room from your phone.
The important idea is that you don’t need to turn your house into a building site or buy everything at once. You can start with a single standalone device, learn how it works, and add pieces only when they solve a specific need.
What is worth automating first
The best first project isn’t the one with the most features, but the one you can understand, test and maintain. These are good places to start:
- Home safety alerts: a door or window left open, water under the sink, or a temperature outside the expected range.
- Simple lighting: turning on a hallway light for a few minutes when motion is detected, without replacing every switch to begin with.
- Temperature and humidity: measuring one room lets you learn the full path between sensor, network, dashboard and automation. To compare entry-level hardware, see the DHT11 vs DHT22 guide.
- Energy use: watching how much an appliance consumes can be more useful than switching it on automatically before you know its habits.
If you want to detect motion, you can start with a PIR HC-SR501 or look into an HLK-LD2410 presence radar if you also need to detect a person who is sitting still.
I would leave locks, motorised blinds and devices connected to mains power for a second stage if you don’t have experience yet. A configuration mistake with a light bulb is annoying; one with a lock or a power relay can have more serious consequences.
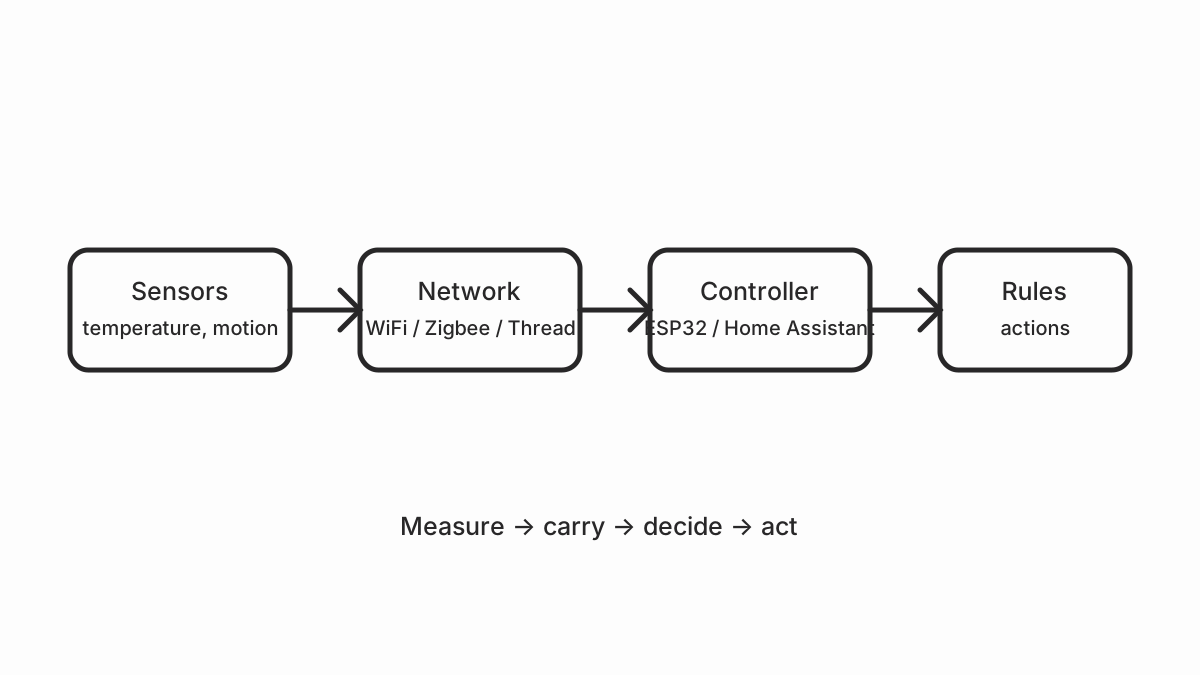
The parts of a home automation system
| Part | Role | Examples |
|---|---|---|
| Sensor | Measures a physical state | Temperature, humidity, motion, contact |
| Controller | Reads the sensor and runs actions | ESP32, ESP8266, board running ESPHome |
| Network | Carries readings and commands | WiFi, Zigbee, Bluetooth, Thread |
| Hub or dashboard | Centralises data and automations | Home Assistant or the device itself |
| Rule | Decides what to do with the information | If there is motion, turn on the light |
Not every project needs a full hub. A sensor can work on its own, but a platform such as Home Assistant is useful when you want to combine devices from different manufacturers and check everything from a single dashboard.
How to choose an ecosystem without overcomplicating it
Before buying, answer three questions: do you want local control or are you happy with the cloud? Will you use battery-powered sensors or continuously powered devices? And do you need to mix different brands?
WiFi is often easy for a first test because almost every home already has a router. However, each device connects directly to the network, and you have to consider coverage, power and the security of the credentials. Zigbee and Thread can be worth considering when you have many low-power devices, but they need a coordinator or a compatible hub. The comparison of Matter, Zigbee, WiFi and Bluetooth explains the differences between layers and protocols.
In DIY projects, an ESP32 running ESPHome is a practical combination for learning. ESPHome lets you describe the device in YAML and send its entities to Home Assistant without having to start out writing firmware in C++. Even so, you should check the exact board, the pinout and the sensor voltage: two modules sharing the same trade name doesn’t guarantee that their wiring is identical.
A first project, step by step
To learn without taking on too much, set up a temperature and humidity sensor in one room.
- Define the outcome. Decide what you want to see: the current temperature, an alert when it crosses a threshold, or a daily history.
- Choose a compatible board. Check the exact model and make sure it has a USB connection for flashing the firmware. The ESP32 guide covers the most common differences.
- Sort out the power. Use a stable supply and don’t connect a sensor to a 5 V pin if your board needs 3.3 V. The correct voltage depends on the module, not just on the sensor’s name.
- Build and test on the bench. Before fixing anything to the wall, check the wiring, the reading and the WiFi connection over several hours.
- Document the setup. Note the model, the pin you used, the firmware version and any settings you changed.
- Install it afterwards. Once the build is stable, put it in its final location and check coverage and the real temperature again.
This order avoids buying unnecessary accessories and makes faults easier to find: if there’s no reading, check power and wiring first; then firmware and network; and finally the automation.
Ideas for what to do next
- Temperature sensor with ESP32 and ESPHome
- Automatic irrigation with ESPHome
- Power consumption meter with SCT-013 and ESP32
Security from the very first device
Even if it’s a test project, follow a few basic rules:
- Change the default passwords and don’t post them in a public repository.
- Keep Home Assistant, ESPHome, your router and the firmware up to date.
- Don’t expose the admin dashboard directly to the internet.
- Put IoT devices on a guest network or VLAN when your router allows it and you know how to maintain that setup.
- Avoid automations that unlock doors, switch dangerous loads or depend on a single internet connection without a manual mode.
Common mistakes when starting out
The most expensive mistake is usually buying before defining the problem. It’s also common to mix WiFi, Zigbee, Bluetooth and Thread without knowing which coordinators or bridges each protocol needs. Another frequent mistake is ignoring power: a sensor that keeps rebooting can look like a software problem when it’s actually getting an unstable voltage or the cable is too long.
Finally, don’t confuse a device showing up in an app with the system being well designed. Test the alerts, check what happens if the network goes down, and always keep a manual way to control the important parts.
External sources
- Home Assistant: official documentation — installation, integrations, automations, security.
- ESPHome: getting started guide — installation, first device, integration with Home Assistant.
- Espressif: ESP32 documentation — SDK, SDK config, pins, memory, WiFi, Bluetooth.
- Matter: Connectivity Standards Alliance specification — version, certification, device types, clusters.
- Zigbee Alliance: specifications — clusters, attributes, profiles, coordinator.
- Thread Group: specification — mesh, border router, credentials, commissioning.
- Home Assistant: hardware recommendations — Raspberry Pi, ODROID, x86, requirements.
If you want to start with a board for DIY projects, continue with ESP32: what it is, what it’s for and how to get started. And if your setup is already working and you want to isolate it from the rest of the network, see how to put it on a dedicated smart home VLAN.