Start by observing the symptom
“The ESP32 doesn’t connect to WiFi” can mean several things: it doesn’t compile, it doesn’t boot, it can’t find the network, it rejects the password, it connects and then disconnects, or it shows up on the router but not in Home Assistant. Pin down the exact point before changing settings at random.
Check the log over USB if you can. Note the board model, the ESPHome version, the network name, the band used and whether other devices connect from the same spot. Don’t publish the password or the full name of your network in screenshots.
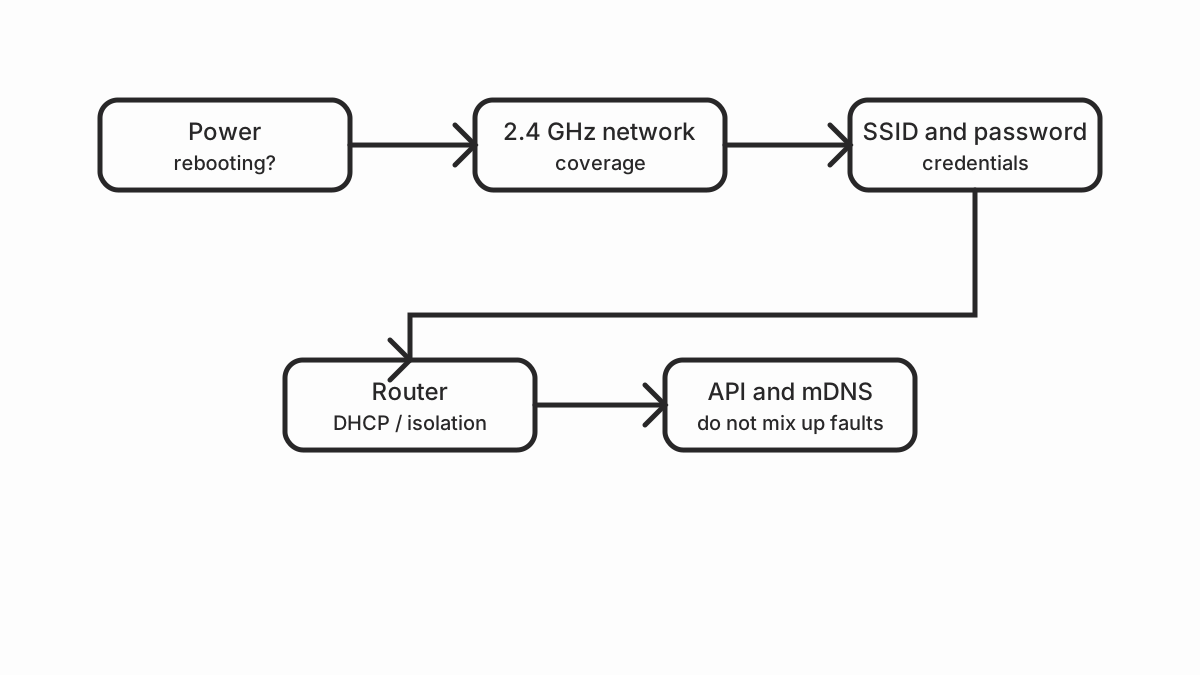
1. Check the power supply and the USB cable
An ESP32 that reboots can’t hold a connection. Try a stable USB power source, a different data cable and a different supply. If the fault only appears when you connect a relay, a display or a sensor, separate the peripheral’s power and check its consumption.
The USB cable is useful for reading logs and flashing, but it doesn’t prove that the supply in the final installation is enough. A device can work on your computer and reboot with a faulty charger or cable.
2. Check the band and the coverage
Many ESP32 boards work with 2.4 GHz networks, not with a 5 GHz-only network. If the router uses the same name for several bands, create a temporary test network with a compatible setup and a simple password with no troublesome characters, to separate coverage from configuration.
Move the board close to the access point during the test. If it connects nearby but not in its final location, the problem is coverage, interference or the antenna position. Don’t hide the antenna behind metal or right next to a noise source.
3. Review the SSID and the password
Check capitals, spaces and special characters. In ESPHome, keep the values in local secrets:
wifi:
  ssid: !secret wifi_ssid
  password: !secret wifi_password
Never put the password in an article, a public screenshot or a repository. After changing it, recompile or update the firmware that is actually on the board: editing the local file does not automatically change the device.
4. Check the ESPHome configuration
Confirm that the wifi block sits at the right level of the YAML, that there
are no tabs and that the device has a valid configuration. A minimal
configuration should include the board, the logger, the API or another control
method, and WiFi.
If you are using a recent ESPHome version, check the syntax changes in ota,
framework and the components. A compilation error is not a WiFi error yet: get
a firmware that compiles first.
5. Look at the router
Check whether the router sees the device and which IP address it assigns. Also review:
- MAC filtering or parental controls.
- WiFi client isolation.
- A guest network with no access to Home Assistant.
- An exhausted DHCP pool or duplicate reservations.
- The WPA password and a compatible security mode.
A guest network may allow internet access while blocking communication with the home automation server. In that case the ESP32 looks connected, but Home Assistant cannot discover it.
6. Tell WiFi apart from API and mDNS
The fact that the ESP32 associates with the WiFi network doesn’t mean Home
Assistant can use it. If the IP shows up on the router, test connectivity from
the local network and check the ESPHome API. .local names depend on mDNS and
can fail even when the IP works.
To diagnose, use the IP temporarily, check whether client isolation is enabled and confirm that the server and the ESP32 are on networks that can talk to each other. Don’t expose the API to the internet to solve a local network problem.
7. Check the firmware and the board
Pick the right board and check the printed model. The boot pins, the memory and
the framework can differ between ESP32 families. If an update introduced the
problem, go back to a minimal configuration and add the components one by one.
8. Check the final installation
Once it works on the bench, move it to its final location and watch the signal, the reboots and the temperature over several hours. A metal box, a cheap power supply or a long cable can change the result.
Quick checklist
- Power supply and cable checked.
- 2.4 GHz network available.
- SSID and password verified without exposing them.
- Firmware compiles and matches the board.
- The router assigns an IP.
- There is no isolation between the ESP32 and Home Assistant.
- API and mDNS checked separately.
- Stable signal in the final location.
External sources
- ESPHome: WiFi component — configuration, parameters, troubleshooting.
- ESP32 guide in homeiotguide — board model, pins, power, framework.
- DHT11 vs DHT22 comparison — sensors often installed alongside the ESP32.
- IoT devices disconnecting from WiFi — diagnosis of intermittent drops.
- Espressif: ESP32 datasheet — official electrical characteristics, pins, power, WiFi features.
- Espressif: ESP32 technical reference — SDK, pins, memory, WiFi, Bluetooth, security.
- Home Assistant: ESPHome integration — discovery, entities, services, API encryption, OTA updates.